The day we were handed the keys to our house there were only two things on my mind 1. pull up the hideous carpet from the hallway and bedroom 2. Takedown the wall/ bookcase that separated the dining room from the living room.
A tiny part of me loved the look of the built-in shelf, but the problem was that it completely closed off the dining area and made everything feel smaller than it needs to be, so without much hesitation and within about 1 hr of having the keys in hand I took the first swing with a hammer and did just enough damage that my husband Glenn has to help follow through and TAKE IT DOWN!
This may be the first but definitely not the last hole in the wall that this house will see. What followed was a week of creating a new modern built-in shelf area and the challenge of figuring out how to close the holes from floor to ceiling, as this beast was built into the house as if it were a part of the foundation itself. Now I have to admit this wall had its own charm and a tiny part of me wanted to keep it or at least a part of it, but all that it left was a slim opening between the dining room and the main living space. This meant less light and less conversation.
 It really did put up quite the fight as we began taking it down. You know how you watch all those home remodelings shows and think, “man demo looks like so much fun.” I am here to tell you it was a ton of work and we had so many oh s**t moments as we realized this bad boy was not only built into the floor but also the walls and ceiling. When I say ceiling, the second we took this down there was a 12′ by 7″ gap into our attic (insert surprised emoji here.)
 But once we had it down and could see space open up it made everything worth it.
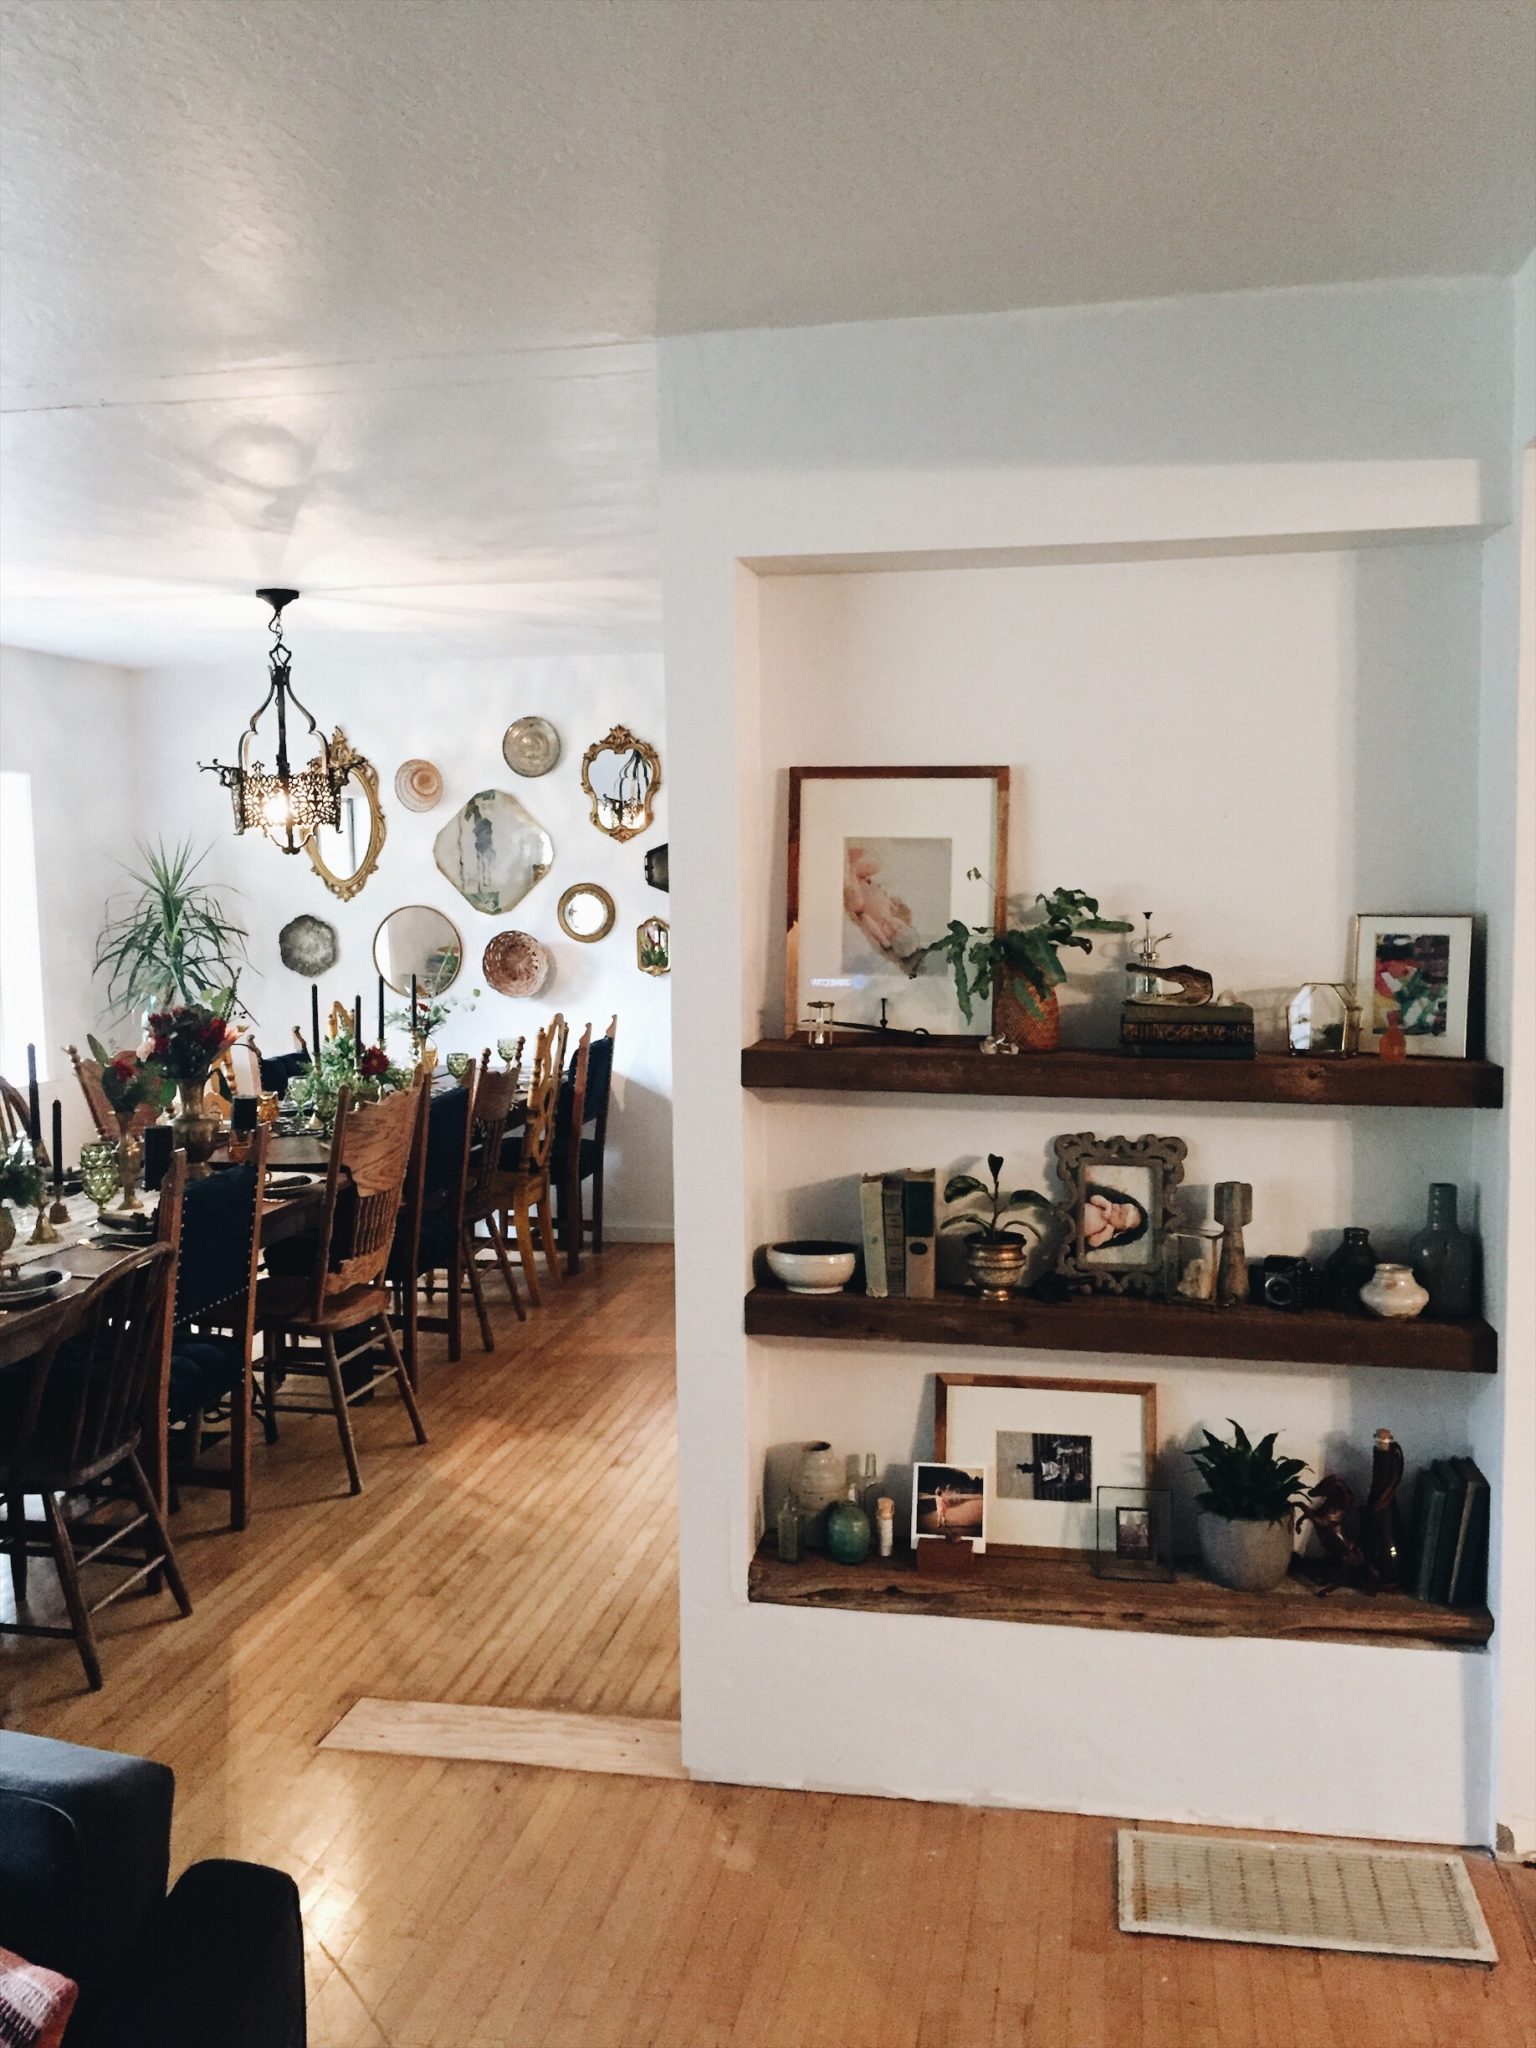
  Once everything was removed I designed a new built-in shelf that would utilize the small wall area that we left, to give some display space because anyone that knows me, knows how much I love some shelf styling ;). The fireplace is a whole other project if you want to see how that turned out you can see it here.
  The moment we had the wall prepped and ready to begin the new shelf.
 Do you remember how I said the wall left a few holes behind? Yeah, those where fun times.
 To build out the new shelf Glenn and I started with framing it out to give the top a little drop and the bottom a bit of a lift. I then added the drywall and tried to match the wall texture as well as I could to the original texture. The wood that I used for the shelves I have had in my wood hoard pile for the last couple of years, just waiting for the perfect project, and I could not be any happier to have used them for this special project. The first real build of Lazy Haven.
 Don’t mind the floor, you can still see where the old wall once was. We have to make a decision as to refinish the original oak floor or to replace all of the floorings throughout the main living space. This picture is also before we added the faux beam across the ceiling.
 I am so please with how the build turned out and the amount of light that is brought into the room makes such a big difference!


